

Recipes
Classic Central Texas-Style Brisket
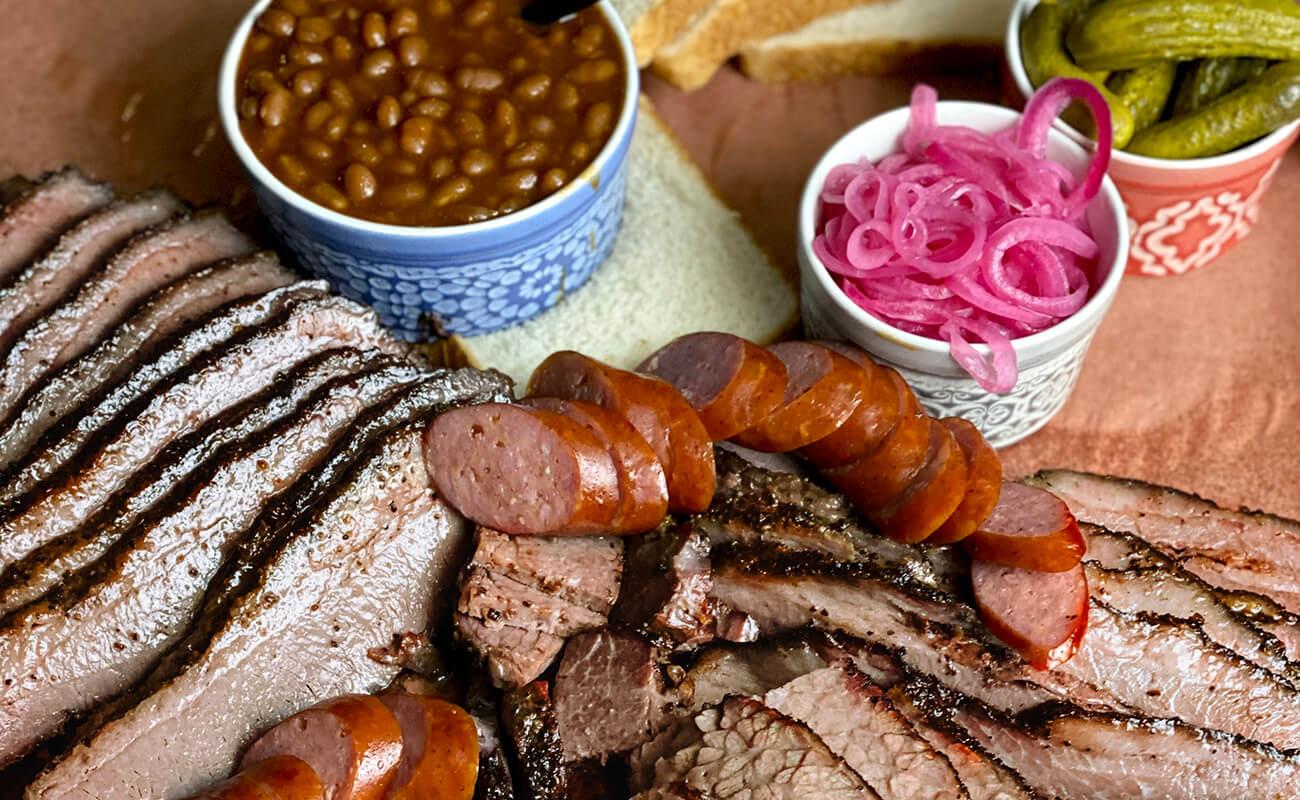
Brisket is king in Texas, and today we’re smoking a traditional Central Texas-style brisket on the Shokunin Kamado. No need to worry about all the work you might have heard about that goes into smoking a brisket, the Shokunin makes low and slow cooking as close to set it and forget it as it comes and turns out to be a smoky, tender and juicy brisket that you’ll be proud to share with friends and family.
Ingredients
Directions
Ingredients
- 1 12-14 pound whole packer brisket
- 1 tablespoon yellow mustard
- 2 tablespoons coarse sea salt
- 2 tablespoons coarse ground black pepper
Directions
Start by preparing your Shokunin Kamado for low and slow cooking - following the simple steps in the guide here. When cooking beef brisket I recommend the use of oak wood chunks. Oak is the traditional wood for smoking Central Texas style brisket, though pecan is also used. Choose what you like or a combination of the two.
While your Shokunin is coming up to temperature, prepare your brisket by trimming away some of the excess fat. As you can see from this brisket here, I like to trim the entire surface so that “new” brisket is exposed and seasoned. You’ll want to leave about ¼-inch of fat on the flat part of the brisket. The flat doesn’t contain a tremendous about of marbling, so leaving that fat on helps to protect the meat while it’s cooking.

The thicker end of the brisket, called the point, can be trimmed more as it contains much more intramuscular fat and won’t dry out while being cooked for an extended period of time. In general, for a 14-pound brisket you can expect to trim off about 2 pounds of scrap for a cooking weight of about 12 pounds.
Tip* Trimming the fat off of a brisket is much easier when the meat is very cold. If possible, put the brisket in your freezer for about 20 minutes before you start trimming it.

Rub entire surface of the brisket with a very thin coat of yellow mustard. The mustard won’t provide any flavor, we’re only using it as a binder to ensure the seasoning sticks to the brisket. Using a shaker bottle, combine salt and pepper and season entire brisket liberally, ensuring you get the sides and ends of the brisket with the seasoning.

With the Shokunin temperature stable at 225°F, the brisket is ready to go on. I recommend lining an 11 X 17 inch cookie sheet with aluminum foil and then placing a wire cooling rack on the cookie sheet. Position your seasoned brisket, fat side up on the cooling rack and then place the cookie sheet in the middle of the cooking grates. Close the lid on the grill and monitor grill temperature.

Note* The use of the cooling rack allows smoke to envelop the entire brisket while the drippings are caught in the cookie sheet - this makes for an easier clean up. If you don’t have a cooling rack, don’t use the cookie sheet at all as an entire half of your brisket won’t get any smoke. Instead, just place the brisket directly on the cooking grates.
Minor adjustments to the exhaust vent may be needed in order to maintain your grill temperature at 225°F, but adjustments will be few and far in between. I highly recommend using a reliable multichannel leave in thermometer to monitor your grill's temperature remotely. You’ll also use this same unit to monitor your brisket temperature in the latter stages of the cook.
Note* If you’ve watched many brisket cooking videos online, or read much about smoking a brisket you’ve noticed that most techniques call for spritzing the meats surface with liquid every hour or so to keep the meat moist. That’s not required when using the Shokunin. It’s such an efficient and sealed cooker, your brisket will not need any added moisture while cooking. This also prevents the need for the lid to be opened and closed during the cook, which results in temperature spikes.
After 6 hours on the grill, your brisket will have taken on plenty of great smoke flavor, formed a nice dark bark and is ready to be wrapped. Remove cookie sheet and brisket from your cooker and set aside.
Adjust exhaust vent in order to increase cooker temperature to 275°F. That’s generally about an extra 10 - 15% opening. Place brisket on a double sheet of pink butcher paper. Add a few tablespoons of the beef drippings from the cookie sheet to the butcher paper, and wrap the brisket as tightly as possible.

Insert meat thermometer probe through the butcher paper and into the middle of the flat part of the brisket. The temperature here will be around 160° +/- 10°F at this point. Place brisket back in the grill and close lid. Continue monitoring the grills temperature, making slight adjustments to the exhaust vent as needed to maintain 275°F.
You’re looking for the internal temperature of the brisket to reach about 203°F as a general rule. That said, “feel” is also important as that will let you know the connective tissue within the brisket has broken down sufficiently to make for a tender brisket. You will have noticed when you wrapped the brisket that it was pretty firm, by 203°F it should feel sort of “jiggly” and flexible.
Remove your brisket when it feels jiggly and the temperature is about 203°F. Allow the brisket to rest, wrapped, until the internal temperature has fallen to 140°F. That’s just about perfect for slicing. This rest period takes about 2 hours, depending on the surrounding environment.

Tip* If you’re not quite ready to serve the brisket as it approaches 140°F, you can also hold it, wrapped, in an oven set to 140°F or inside a well insulated cooler for a couple of hours. This allows for some “slop time” when planning for a dinner party, etc. as you’ll want to serve the brisket immediately after slicing.
Using a large brisket knife, slice brisket across the meats grain starting at the flat end. Slice meat into ¼-inch slices until you get to the point end of the brisket. Once at the point, rotate the direction of slicing by 90° and slice the point down the middle, separating it into two halves. Then continue slicing the point into slightly thicker slices, or into 1-inch cubes for serving.